Managing your users
You need access to the User Management feature to add be able to manage your users.
This feature allows you to create new users or update existing ones. If you don't have access to this feature, you will not be able to see the User Management section in the navigation bar on the left.
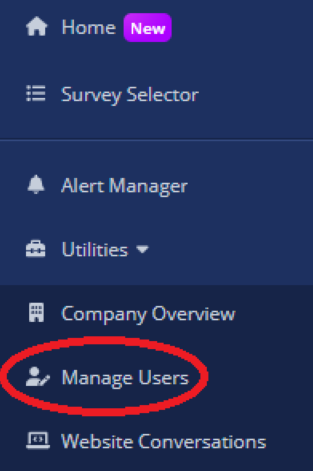
Upon clicking the User Management link, you will be taken to the Manage Users page.
Here is what the Manage Users page looks like:
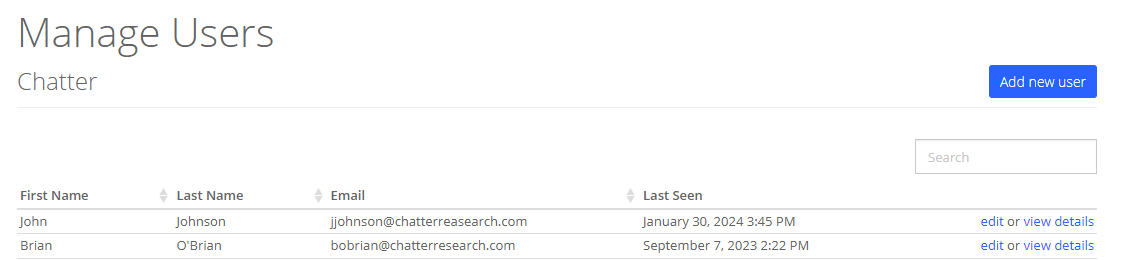
Once in the Manage Users page, you can add a new user by clicking the Add New User button at the top right of the page.
To update an existing user, you can click the edit button on the right side of the user's row.
To view a user's details, you can click on the view details button on the right side of the user's row.
User Details
When you click on the view details button, you will be taken to the User Details page.
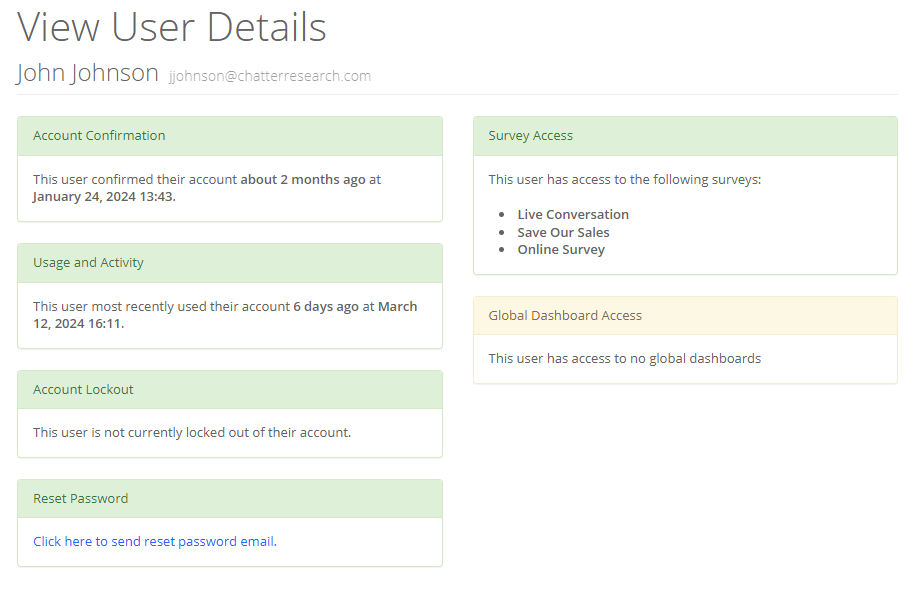
Here you can see the following information about the user:
- User's name
- User's email
- If the user has confirmed their email
- If the user is active and when they were last active
- If the user is locked
- Which surveys the user has access to
- Which global dashboards the user has access to
You can also reset the user's password by clicking the Click here to send reset password email button.
User Management Page
The User Management page is where you can create users and update existing ones.
The page is the same whether you are adding or updating users, except the user's current information will be pre-filled when editing their profile.
Note that the User Profile page is the same as the User Management page.
If the user viewing the page does not have access to the User Management feature, they will only see the General Settings section (see below).
General Settings
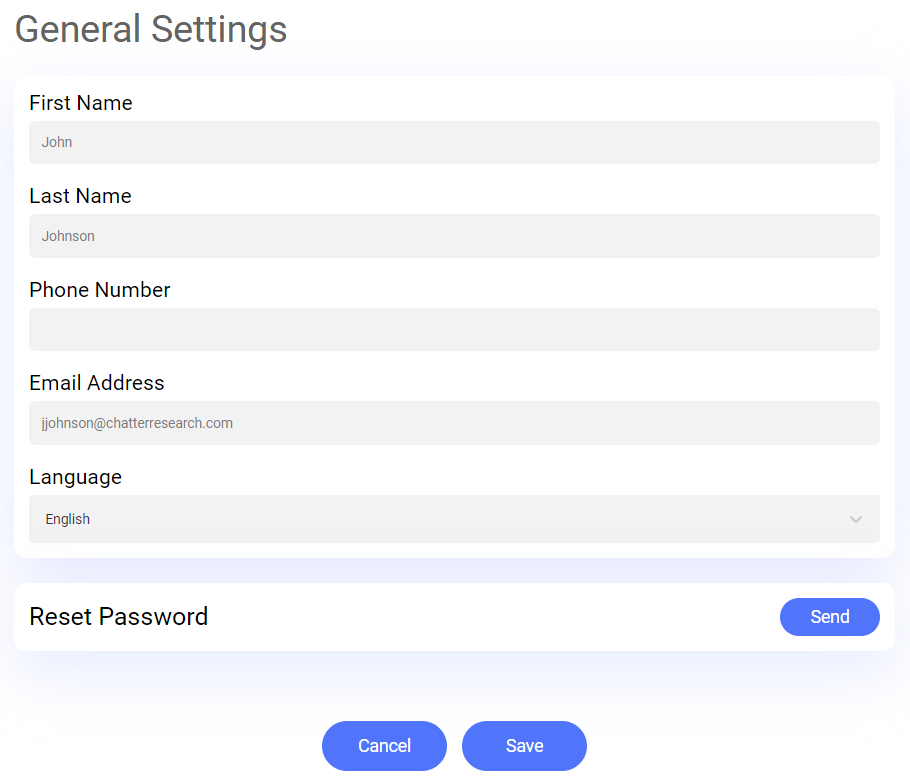
In this section you have the following fields:
First NameLast NamePhone NumberEmailLanguage
You can also send a password reset email to the user by clicking the Reset Password button.
Advanced Settings
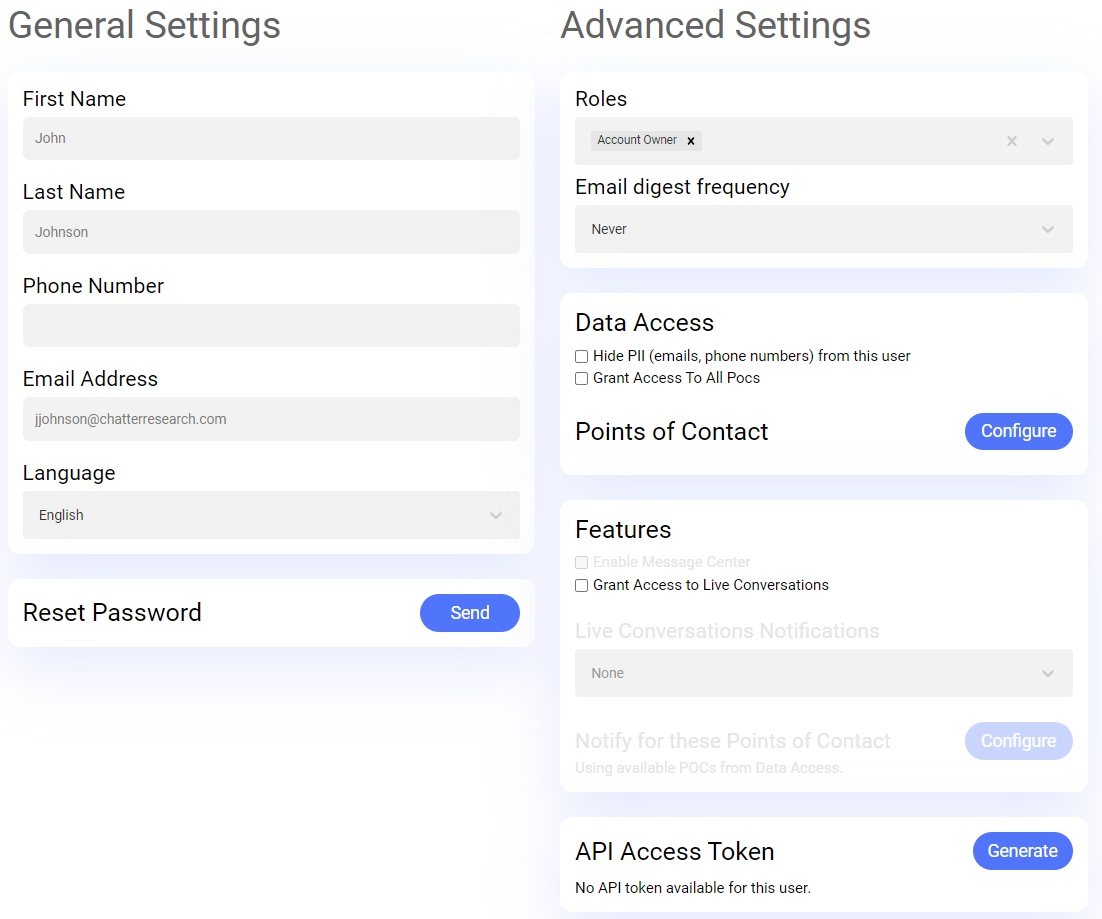
This section is only visible to users who have access to the User Management feature.
Here you can see the user's roles and the frequency of their email digests.
You can also modify the user's restrictions and access to various features of the platform:
Hide PII- If checked, the user will not be able to see personally identifiable information in the platform.Grant Access To All Pocs- If checked, the user will have access to all points of contacts in your company.Points Of Contact- Upon clicking this button, a window will appear where you can select which points of contacts and point of contact groups the user has access to.Enable Message Center- If checked, the user will have access to the Message Center feature.- This checkbox will be disabled if the Message Center feature is not enabled for your company.
Grant Access to Live Conversations- If checked, the user will have access to the Live Conversations feature.- This checkbox will be disabled if the Live Conversations feature is not enabled for your company.
- If this checkbox is checked, the following settings will be available (they will be disabled if the checkbox is not checked):
Live Conversations Notifications- Allows to configure if the user will receive notifications for live conversations and how they will receive them.Notify for these Points of Contact- Upon clicking this button, a window will appear where you can select for which points of contacts and point of contact groups the user will receive live conversations notifications.
API Access Token- Allows to generate a new API access token for the user, copy the user's API access token, or delete it.
Note that both Live Conversations Notifications and Notify for these Points of Contact are only visible if Grant Access to Live Conversations is checked.
Also note that not selecting any point of contacts or point of contact groups in the Notify for these Points of Contact will behave as if all the point of contacts the user has access to were selected.
If you are not sure if a given feature is enabled for your company, please contact your Customer Success Manager.
Survey Configuration
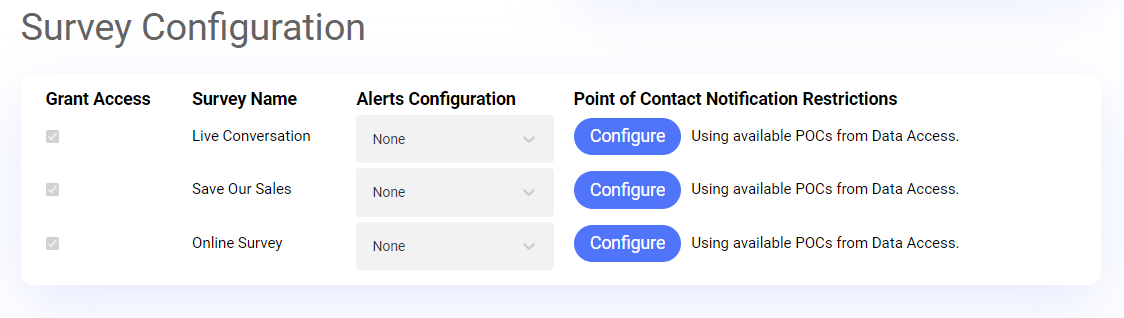
This section is only visible to users who have access to the User Management feature.
Here you can select which surveys the user has access to by checking the checkbox next to the left of a given survey's name.
You can also change if and how the user will receive alerts for a given survey with the Alert Configuration dropdown.
You can also set which point of contact will raise alerts for the user with the Point of Contact Notification Restrictions column.
For more information on how the point of contact selector works, see the Advanced Settings' Notify for these Points of Contacts setting.
Please note that if a given survey's checkbox is disabled, it means that this survey has been enabled by default for all users, and the user's access to it cannot be changed.